Ansible-Playbook
For this exercise, we will need:
- For this exercise, we will need:
- Oracle VM VirtualBox installed
- Any version of a Linux server (for example, AlmaLinux 9.5)
- A terminal capable of establishing an SSH connection (for example, PowerShell)
VM Preparation:
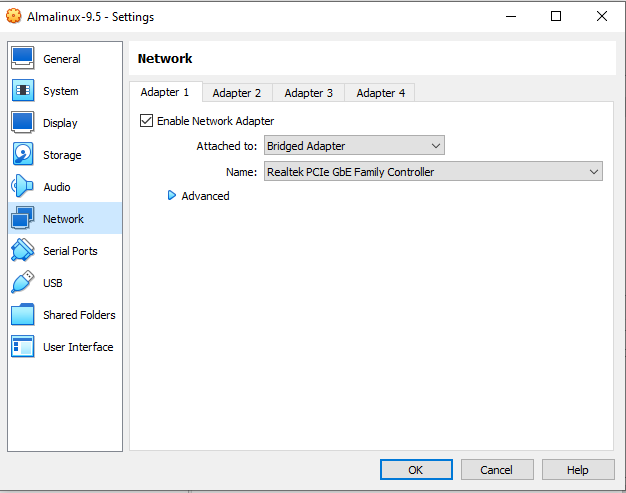
- Open the VM’s Settings.
- Go to Network.
- Under Attached to, select Bridged Adapter.
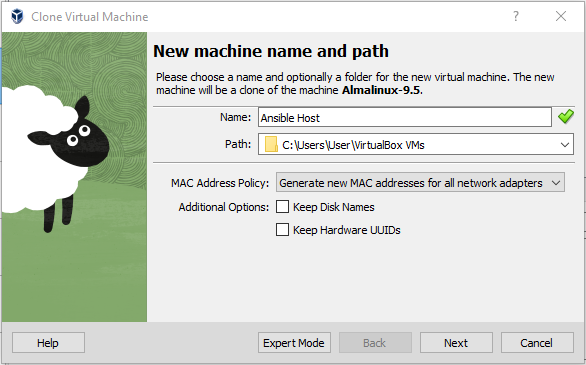
- Clone the original VM in which you installed the Linux OS and name it “Ansible Host.”
- Be sure to select the option to generate new MAC addresses.
- Repeat this process for Host01, Host02, and Host03.
- You can group all four VMs and take snapshots. If something goes wrong, it will be easy to roll back your actions.
- The installation process will be skipped.
SSH connection and editing some configuration:
- Run the VM.
- To be able to connect to the VMs, we need to check their IP addresses. Open each VM window one by one, log in, and type
ip a. Write down their IP addresses, and note which VM each one belongs to.

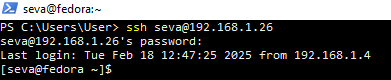
- Open four PowerShell windows and type the following command
ssh username@ip_that_you_write
To change the hostname, type:
sudo hostnamectl set-hostname ansible
To apply the settings, type:
exit
Then log back in.
- To add hostnames, type:
sudo vi /etc/hosts
It should look like this:

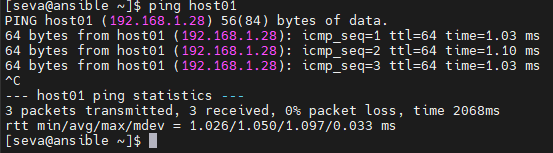
You can copy this section, as it will be the same for every host. We can check if everything is working by executing:
ping host01
For example:
- Now we need to repeat the steps for changing the hostname and adding IP addresses to the
/etc/hostsfile.
Preparation for work with ansible:
- We need to create a user on Host01-03. This user will allow Ansible to connect to these hosts and perform the required playbook actions. Cretate user:
sudo adduser ansible
Set the user password: bash sudo passwd ansible Add the user to the wheel group (this will allow it to perform required system actions): bash sudo usermod -aG wheel ansible
- Repeat these steps on all hosts.
- On the ansible system, generate ssh keys so that you can have passwordless communications with each host:
ssh-keygen
- Press Enter to use the default settings.
- Copy the public key to all hosts:
for i in 1 2 3; do ssh-copy-id hostname@host0$i; done
Ansible instalation and configuration:
- Install epel-release repository:
sudo dnf install epel-release y
- Install ansible:
sudo dnf install -y ansible
- Make a dir for storing playbooks:
mkdir Ansible_Playbooks
- Go to the created directory:
cd Ansible_Playbooks/
- Create nginx yaml file (playbook itself):
touch Nginx_Playbook.yaml
- Create a playbook, paste the folowing text:
					---
- name: Install and Start Nginx on AlmaLinux 9.5
  hosts: webservers
  become: yes
  tasks:
    - name: Ensure DNF is up to date
      dnf:
        name: "*"
        state: latest

    - name: Install Nginx
      dnf:
        name: nginx
        state: present

    - name: Enable and Start Nginx
      systemd:
        name: nginx
        enabled: yes
        state: started

    - name: Open HTTP and HTTPS Ports in Firewalld
      firewalld:
        service: "{{ item }}"
        permanent: yes
        state: enabled
      with_items:
        - http
        - https

    - name: Reload Firewalld
      command: firewall-cmd --reload

    - name: Verify Nginx is Running
      command: systemctl is-active nginx
      register: nginx_status

    - name: Print Nginx Status
      debug:
        msg: "Nginx is {{ nginx_status.stdout }}"
- Open the file /etc/ansible/hosts and append the folowing:
					[webservers]
host01 ansible_host=IP_of_host01
host02 ansible_host=IP_of_host02
host03 ansible_host=IP_of_host03

[webservers:vars]
ansible_user=ansible
ansible_ssh_private_key_file=~/.ssh/id_rsa
- To run you task type the folowing:
ansible-playbook path_to_your_playbook_yaml_file -K
- Voilà! We have automated the web server installation. We can download preconfigured Ansible collections from the official Ansible website.