Virtualisation with KVM/QEMU
For this exercise, we will need:
- VMware installed. I tried Oracle VirtualBox, but it doesn’t properly support nested virtualization.
- Any version of a Linux server will work. Personally, I’ll be using AlmaLinux 9.5 on hypervisors with NFS, and Ubuntu 22.04 on Virtual Machine Manager (VMM).
- A terminal capable of establishing an SSH connection (for example, PowerShell). I prefer to use MobaXterm.
VM Preparation:
The detailed process of creating a VM on VMware will be skipped; you can check the details here.
- Create two VMs and name them Hypervisor01 and Hypervisor02.
- Nested virtualisation should be enabled.
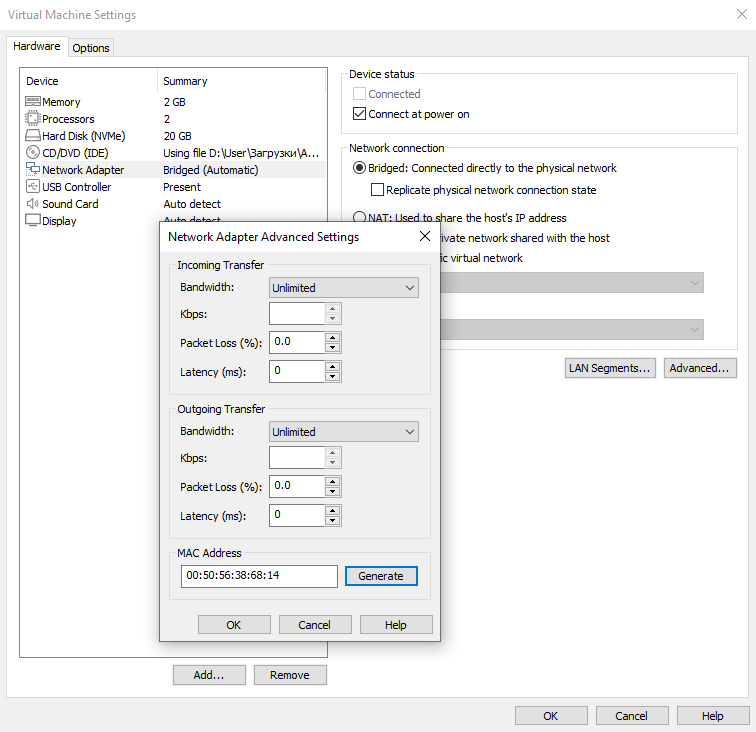
- Swithc network adapter to the bridged. All VM’s will be on our local network with inthernet acess. Don’t forget to check the MAC addresses and generate new ones if they are the same on the VMs. VM Settings -> Network Adapter -> Advanced -> Generate.
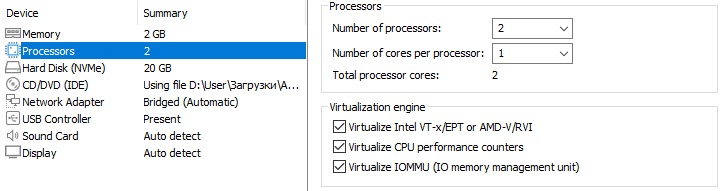
- Ensure they have enough resources to support another VM that will be installed (nested – Virtualize Intel VT-x/EPT or AMD-V/RVI) later. In my case, it will be Alpine Linux because it is lightweight and has minimal system requirements. My settings are:
- Create the NFS VM.
- Clone one of the Hypervisor VMs and rename it ‘NFS’. You can allocate less RAM and CPU resources. Also, disable nested virtualization.
- Create a server where VMM will be installed.
- Align the system resources with the Linux distribution you will be using. My settings are:
VM's naming and basic network set up. SSH connection.
- Run your VM’s and log in.
- Let’s first check if our machine supports hardware assisted virtualization by executing:
egrep -cwo 'vmx|svm' /proc/cpuinfo
If the result is a number bigger than 0 we can safely continue. Otherwise, we must check in case of physical machine, if the processor supports virtualization and if it is enabled in BIOS, or in case of a virtual machine, if the virtualization instructions are passed on (nested virtualization enabled).
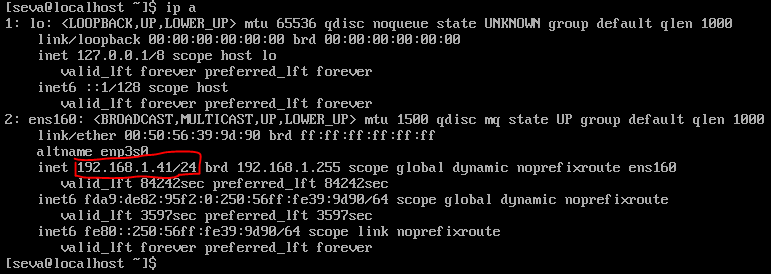
We need to collect their IP addresses. Open each VM window one by one, log in, and type
ip a. Write down their IP addresses, and note which VM each one belongs to.
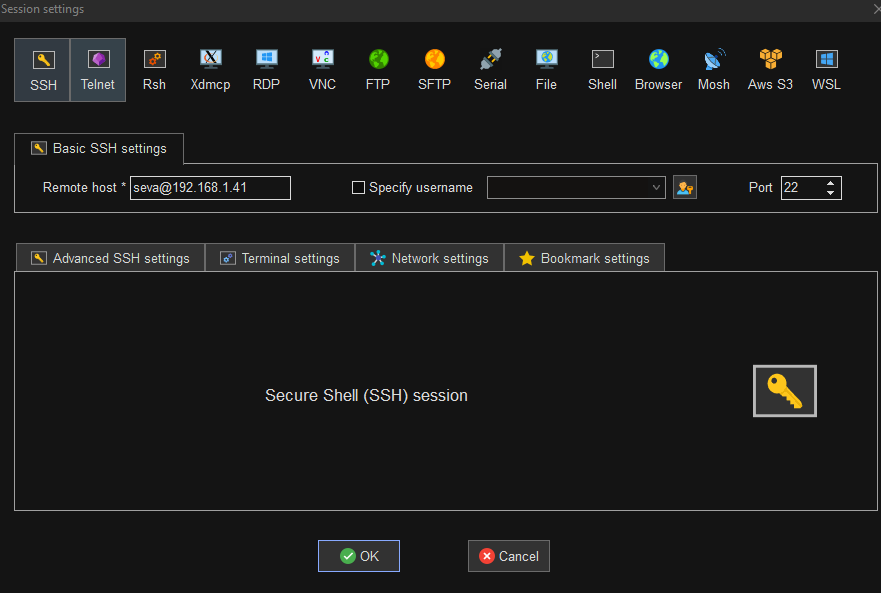
- Open the terminal in my case, it’s MobaXterm. Then, create the folder (Right click -> new folder).
- Inside the folder, establish the connection to the hosts. (Right click -> New connection).
- Inside the connection window, locate the
Remote_hostfield. Type inusername@host_ip. My settings are:
4. Rename your VM’s: We need to check if the user is a member of the wheel, adm or sudo group. The specific group name depends on your Linux distribution.
- Check that you can with the cpmmand:
sudo cat /etc/group | grep -i username
If you are already a member, you can skip the next step. If not, proceed as follows: In our case, AlmaLinux is part of the Red Hat Linux family, where the group is called ‘wheel’.
- Add your user to the wheel group to enable executing
sudocommands. - To become root, use the following command:
su - root
- Add user to the wheel group:
usermod -aG wheel username
- To apply the changes, you need to log out or reboot. Execute the following command directly on the VM:
exit
- Rename your VM by executing, also directly on the VM:
sudo hostnamectl --set-hostname Hypervisor01
- Execute the
exitcommand again to apply the changes. Repeat this process on all the VMs. Aligned with their names and purposes. Then reestablish the ssh connection.
Package for instalation on both Hypervisors.
- Update system packages:
sudo dnf update -y
2. Enable the extra packages repository by installing epel-release:
sudo dnf install epel-release
3. Install the packages needed to run KVM, QEMU, and manage VMs:
sudo dnf install -y qemu-kvm libvirt virt-install bridge-utils nfs-utils
4. Enable and start the libvirt daemon:
sudo systemctl enable --now libvirtd
- Check the status:
systemctl status libvirtd
5. SELinux configuration.
- By default, SELinux is set to enforcing mode. For security purposes, we will not disable it. Instead, we need to allow NFS services by executing the following command:
sudo setsebool -P virt_use_nfs 1
NFS server instalation and configuration
- Install NFS utilities on NFS server:
sudo dnf install -y nfs-utils
- Enable and start the NFS server service
sudo systemctl enable nfs-server --now
2. Create a directory to export:
sudo mkdir -p /var/nfs
- You can also adjust ownership and permissions as needed. For instance:
					sudo chown -R nobody:nobody /var/nfs
sudo chmod -R 0777 /var/nfs
3. Configure the export in /etc/exports
sudo vi /etc/exports
Example line to allow read-write access for every ip:
/var/nfs *(rw,sync,no_root_squash)
The asterisk (*) represents all IP addresses. However, you can specify a particular IP address or a range if needed.
Export the directory:
sudo exportfs -r
4. Open necessary firewall ports:
					sudo firewall-cmd --permanent --add-service=nfs
sudo firewall-cmd --permanent --add-service=rpc-bind
sudo firewall-cmd --permanent --add-service=mountd
sudo firewall-cmd --reload
5. As we already discussed, SELinux is set to enforcing mode, you might also need to allow NFS to serve files from your chosen directory. Assign a proper SELinux context to the shared directory:
sudo chcon -t public_content_rw_t /var/nfs
Mount the NFS Share on Each Hypervisor
- Create a mount point. If multiple hypervisors share the same mount point (and the same images), we will be able to perform live migration. That’s why we will use the default folder for libvirt images:
/var/lib/libvirt/images
- Test connectivity by manually mounting the NFS share:
sudo mount -t nfs NFS_server_IP:/var/nfs /var/lib/libvirt/images
If multiple hypervisors will share the same mount point (and the same images) we will be able to perform live migration.
- Verify it’s mounted correctly:
df -h | grep nfs
2. To have the NFS share mounted automatically whenever the client restarts, add an entry to /etc/fstab:
NFS_server_IP:/var/nfs /var/lib/libvirt/images nfs defaults,_netdev 0 0
3. By default, root can manage libvirt without any extra group membership. However, if you plan to manage virtual machines from a non-root account (for example, using virt-manager or virsh as a regular user), you generally need to add that user to the libvirt group. This grants the necessary permissions to communicate with the libvirtd service.
sudo usermod -aG libvirt username
- Afterward, log out and back in (or restart your session) for the group membership to take effect.
VMM with ubuntu 22.04 with GUI
- Install required packages:
					sudo apt update
sudo apt install -y virt-manager qemu-kvm bridge-utils openssh-client ssh-askpass
- virt-manager: GUI for managing virtual machines locally and remotely via libvirt.
- qemu-kvm: QEMU KVM tools (often required for certain drivers or CLI integration if you do local virtualization).
- bridge-utils: If you want bridging on Ubuntu too.
- openssh-client: So you can SSH into the hypervisors if needed. More often than not, this package is not installed by default in Ubuntu workstation distributions. If it’s a server, it may prompt you during the installation process to install the openssh-client.
- ssh-askpass: This utility will prompt a window asking you to enter your SSH password.
2. Work with Virtual Machine Manager
To add a host to the list of known hosts, we need to establish a basic SSH connection to our Hypervisor hosts:
sudo ssh username@hypervisor_IP
- Start Virt-Manager from the application menu (or type
virt-managerin terminal) - Go to File > Add Connection…
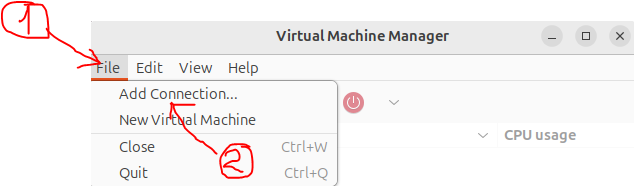
- Enable Connect to remote host over SSH
- Hypervisor: QEMU/KVM
- Username: (your SSH user on the AlmaLinux hypervisor)
- Hostname or IP: e.g. 192.168.1.44

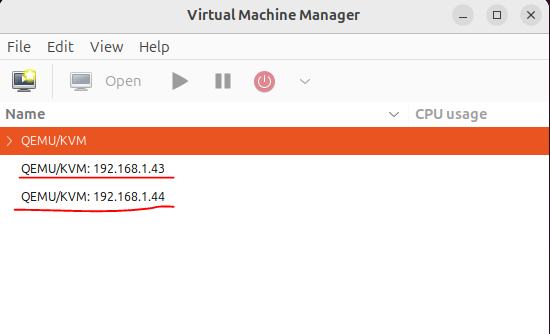
Once connected, you should see both hypervisors listed in Virt-Manager. You can manage, create, and start VMs on them.
3. Preparation Steps for Creating the VM
- We need to download the operating system in our case, Alpine Linux. First, go to the NFS server, install the necessary tool for downloading, and then download the image:
					sudo dnf install wget
sudo wget https://dl-cdn.alpinelinux.org/alpine/v3.21/releases/x86_64/alpine-standard-3.21.3-x86_64.iso
Move downloaded image to the shared folder:
sudo mv /path/to/iso /path/to/shared/folder
4. Creation of the VM:
Open the Virtual Machine Manager (VMM) on Ubuntu 22.04
Launch the VMM interface
Use the cursor to navigate and click on the previously established QEMU/KVM connections
Navigate to -> File -> New Virtual Machine
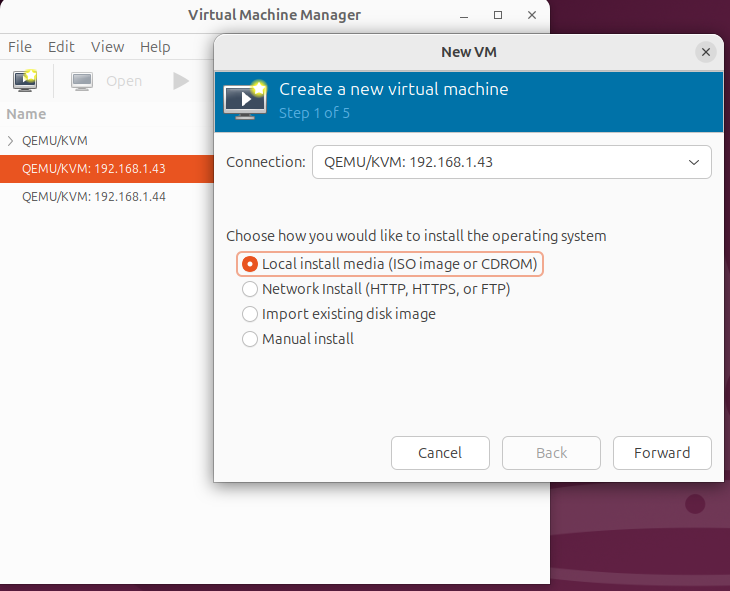
Select option:
Local install mediaand click -> ForwardClick -> browse
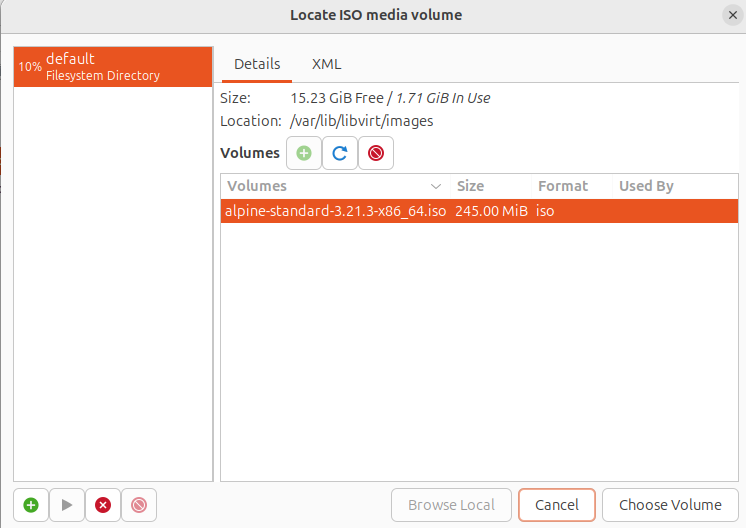
If you mounted the NFS shared folder in
/var/lib/libvirt/images, then you will be able to see the image
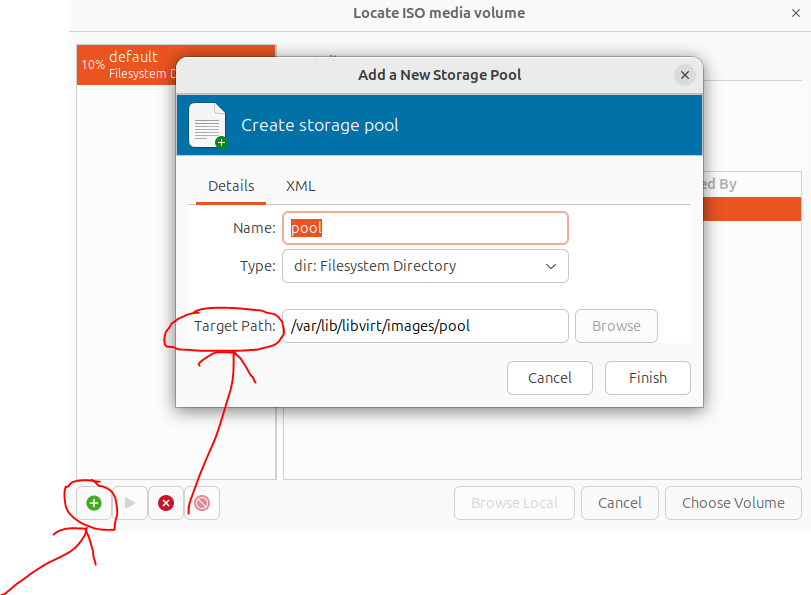
- If not, you will need to manually add a pool by clicking the green plus sign at the bottom left. In the popup window, specify the target path
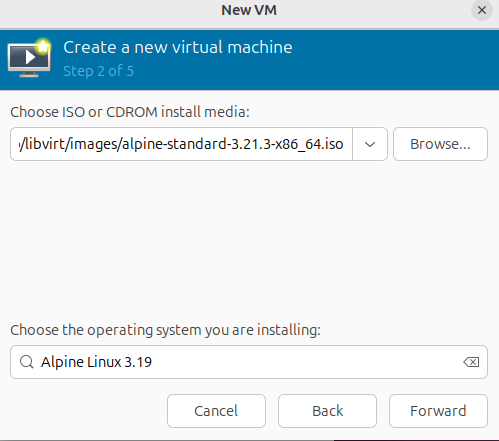
- After this, select your ISO image and click
Select Volume. In the popup window, type your operating system in the bottom field. If it’s not listed, choose the closest operating system to it and thenForward
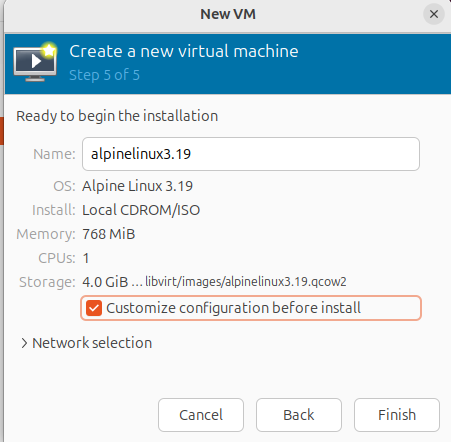
- Again, a popup window will appear displaying RAM and CPU requirements. You can adjust these settings as desired
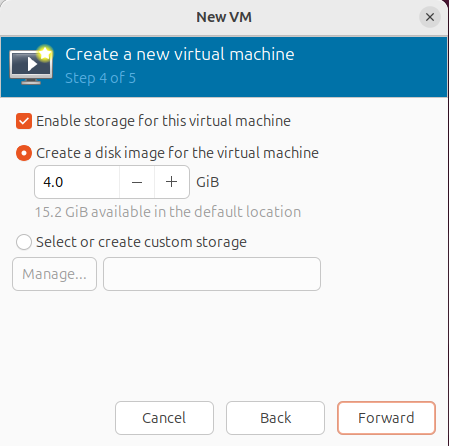
- We’re almost there! 🙂 In the next popup window, select
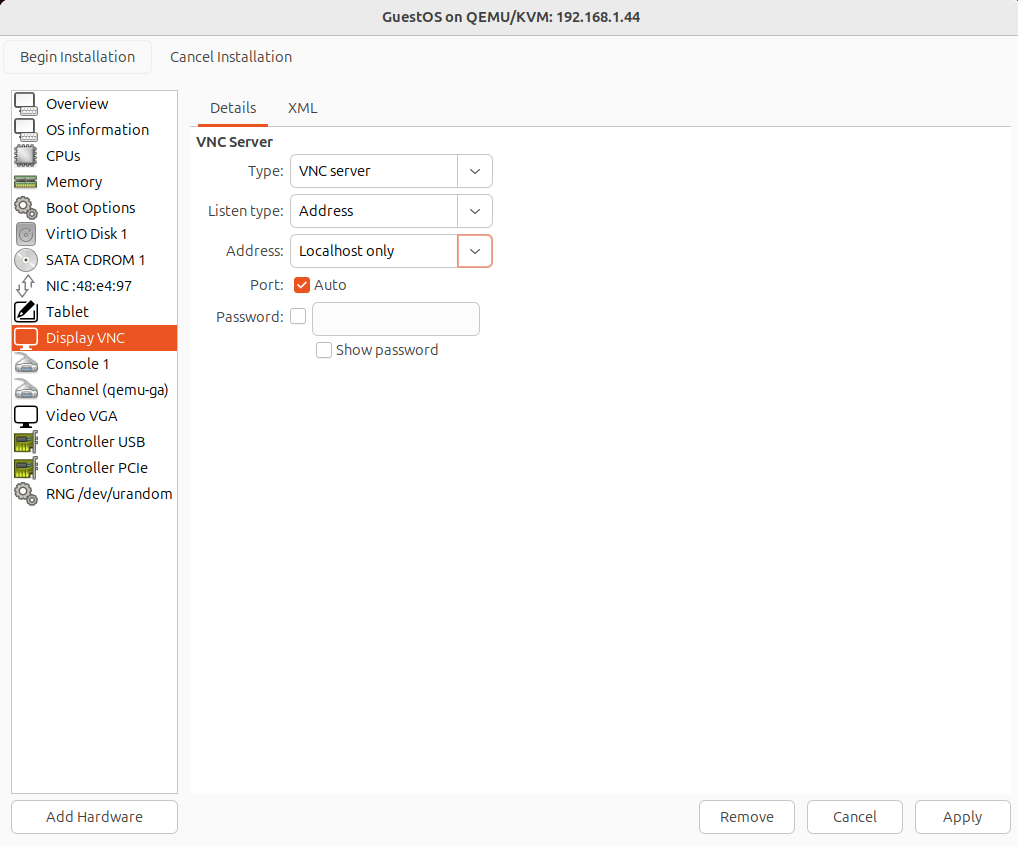
Customize configuration before install
- We will keep the default network and other settings except for a couple. Extremle important to know how work SSH Tunnel to Localhost. Virt-manager establishes a secure SSH tunnel and forwards VNC (or SPICE) traffic to localhost on the hypervisor. If VNC is set to listen on 0.0.0.0 (all interfaces), then you must open port 5900 in the hypervisor firewall and expose it externally, which is typically unnecessary and less secure
- Select
Boot Options, enableCDROM, and using the arrows, move it to the top. Then pressApply
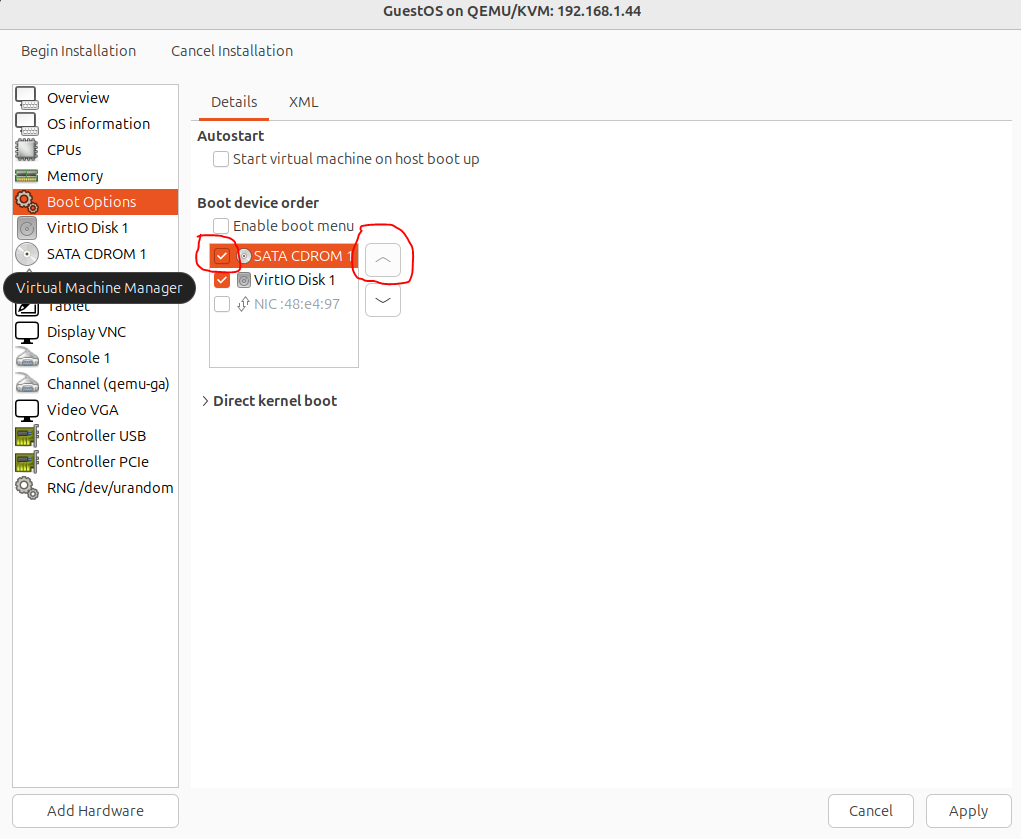
- Click
Begin Installationon the top left corner5. Installation of Guest OS
- After pressing Begin Installation popup window will appear
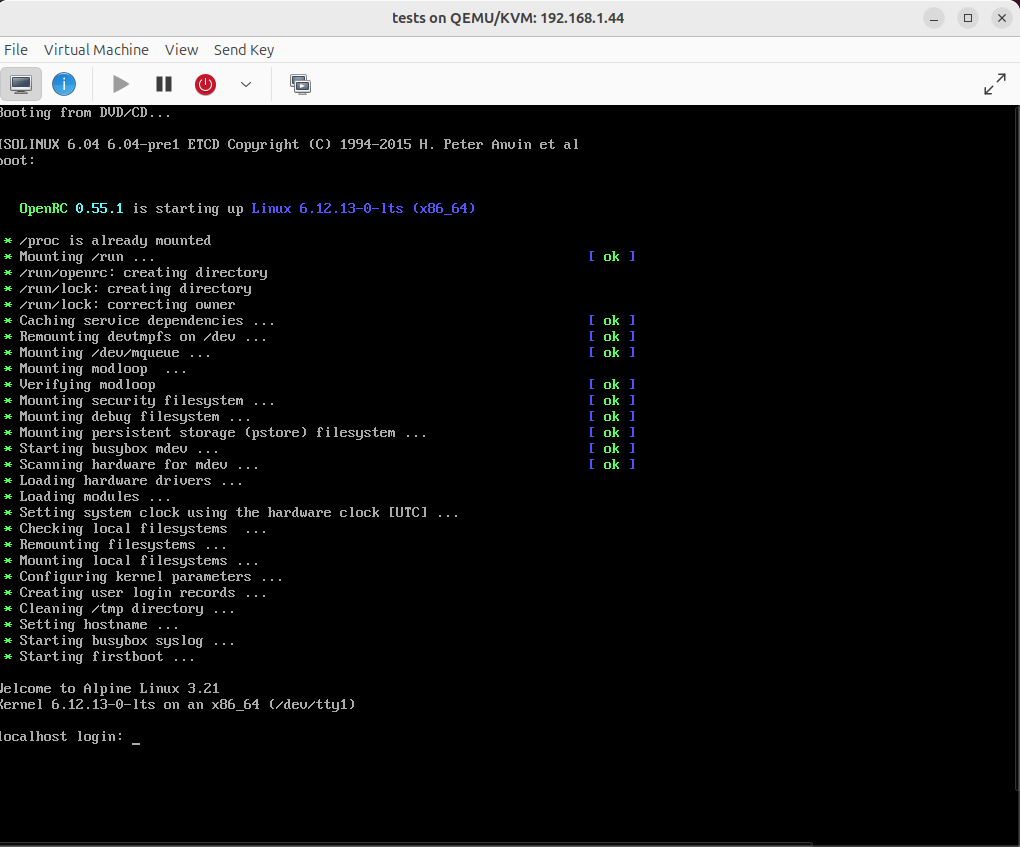
Install the Desired OS (in our case, Alpine) and Shut Down the VM
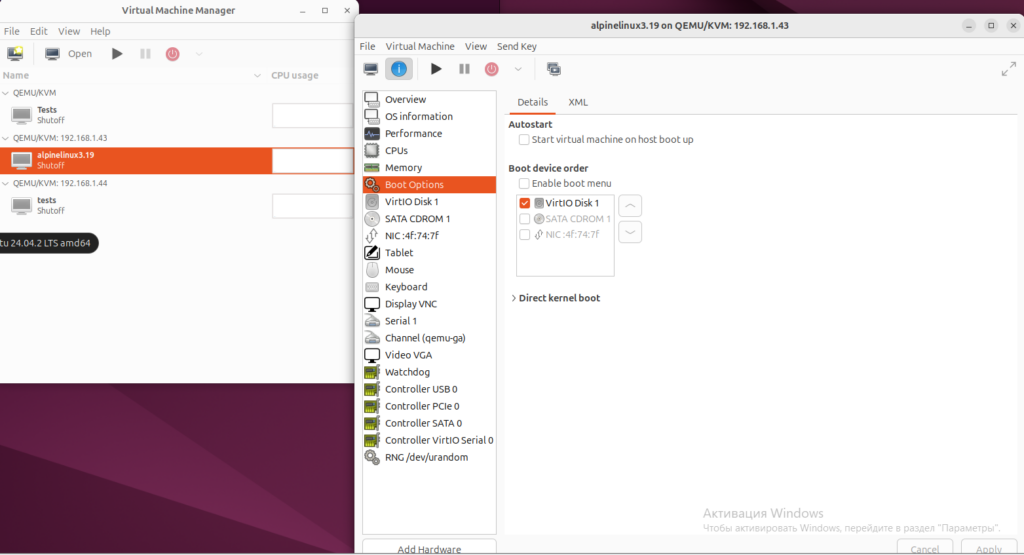
Open the VM manager, select the installed VM, and in the popup window, navigate to
Boot Options. DisableCDROMand clickApply. From now on, your OS will boot from the installed virtual disk.
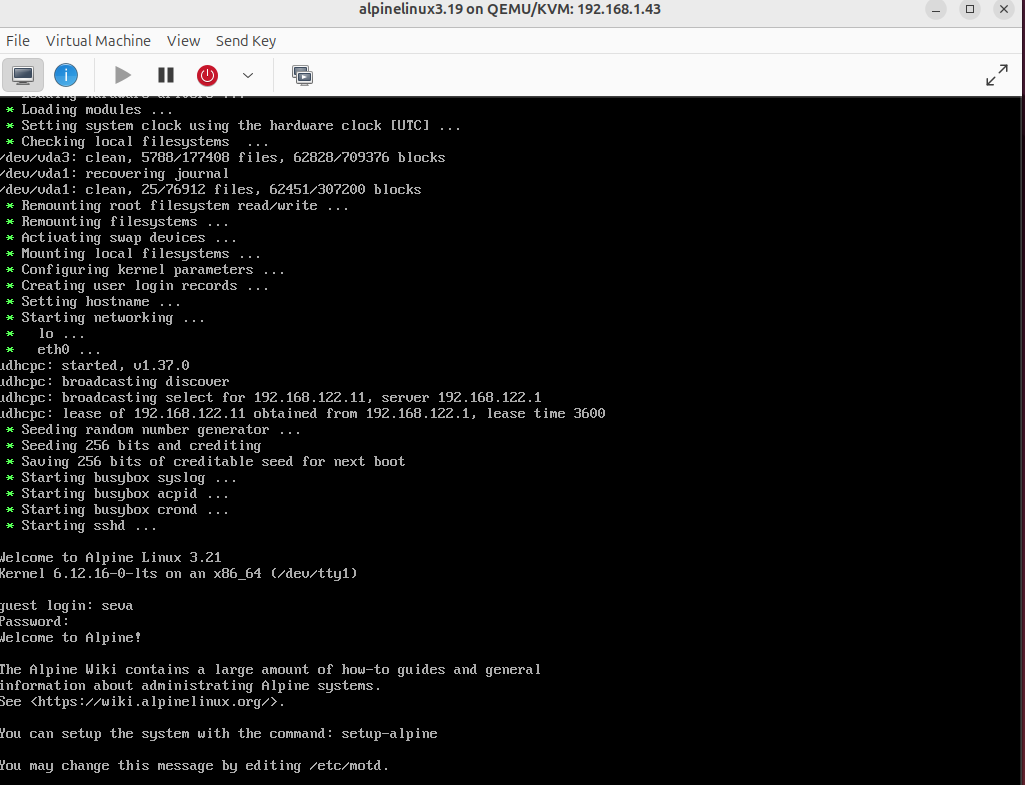
Congratulations! We now have our local cloud, and we can even migrate launched VMs from one Hypervisor to another. I will explain how to do this later.